The Volume Measurement Tool is a great way to figure out the total size of a pile at your work site. Instead of bringing in heavy machinery and belt scales to weigh materials, a few clicks on the Botlink Capture App will do the same job more accurately and at a fraction of the cost.
If you’d like an in-depth rundown on how to use the Volume Measurement Tool, check out the video above. Or read on for a quick start guide:
1. Start by clicking the center on my location button in the upper left corner of the screen. It’s right above the “+” and “-” symbols.
2. To start the upload, click the upload button on the left side of the screen. It’s right beneath the magnifying glass icon.

To begin the upload, click on the upload button highlighted in the above image.
3. A menu will pop up, giving you the ability to name your flight whatever you’d like. Once you’ve typed something in, select the 3D Model option.

4. You can then select the images you want to upload. Once you’ve located them, click upload.
5. The option to edit your upload name will pop up. Data about your flight details will be displayed, as well as the option to delete any unnecessary files or images.

Click on the "x" symbols to delete any unnecessary images.
6. Use the anchor points (the white dots on the perimeter) to set the cropping area. These can easily be expanded and contracted to fit over a particular part of the map. Once you’re happy with the cropping area, click Upload. All your images will then quickly be uploaded. You can choose to upload more flights if you’d like or click the back button (the arrow pointing left) to begin processing. Once it has been completed, click on View Flight.
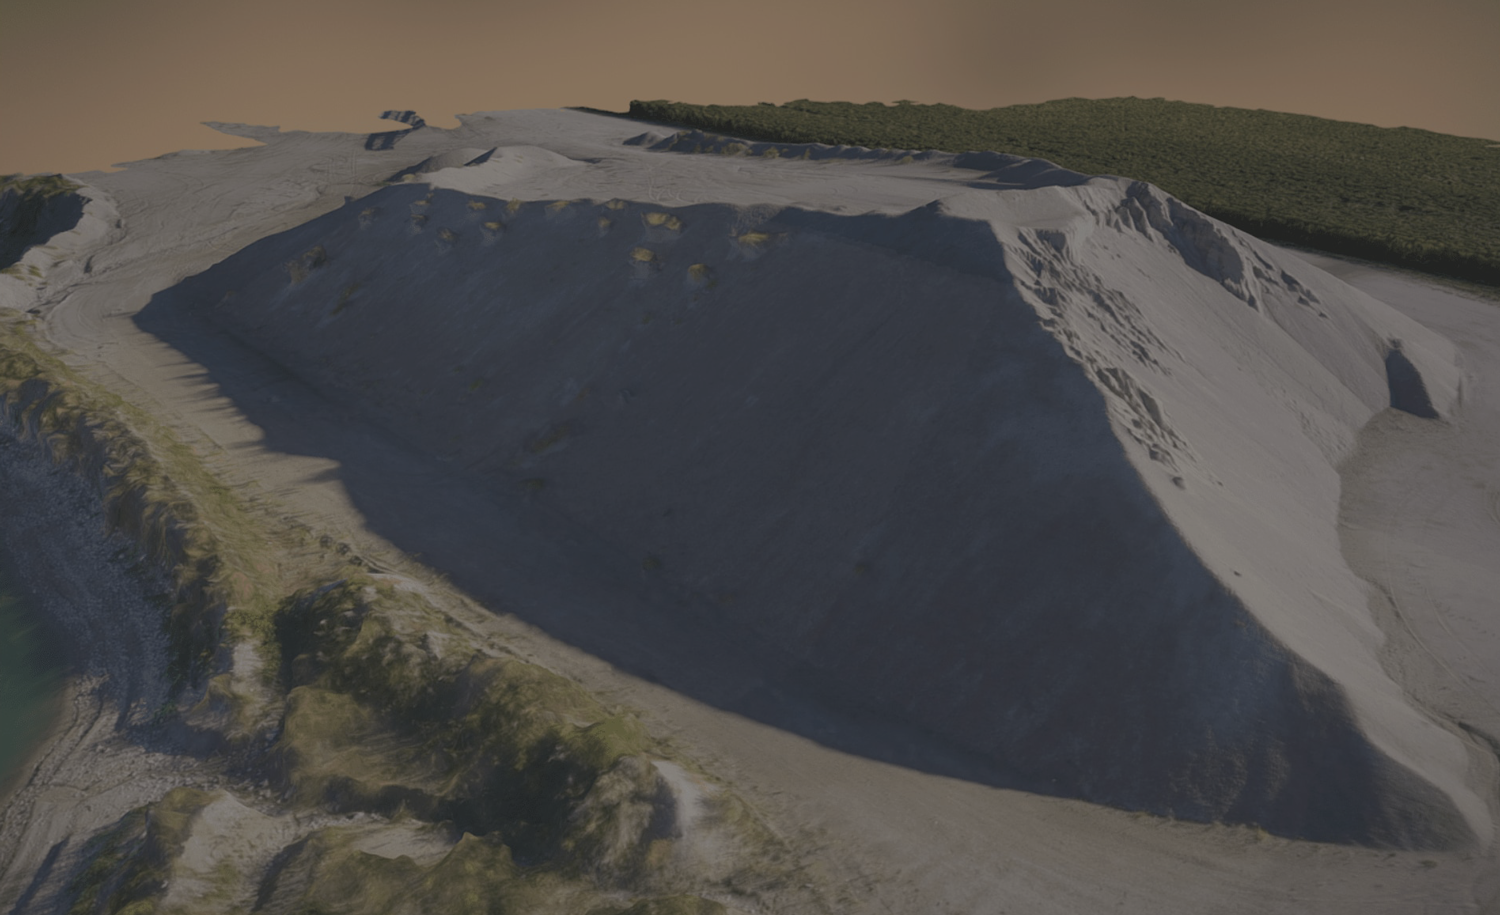
7. Survey, DSM (Digital Surface Model) and 3D map options will pop up. DSM will reveal terrain information and 3D will create a detailed map you can rotate, zoom in on and analyze from any angle.
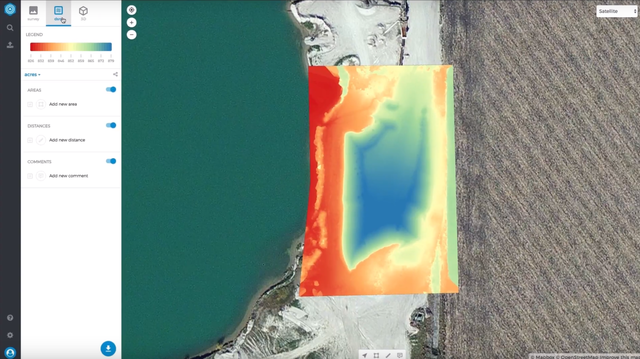
The DSM view can be used to identify where current low/high points might exist, visualize where water will drain and accumulate and allow you to quickly see where earth may need to be graded.
With a 3D model, you can zoom in, rotate and analyze your data from entirely new dimensions.
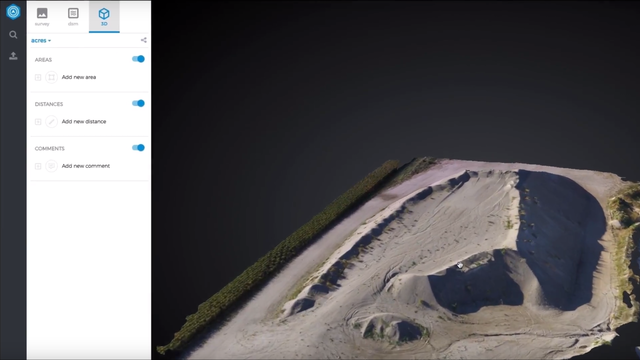
8. To make a volume measurement, go to the survey view and select add new area. You can now add custom points all around your pile. As you add them, they will automatically connect with one another. Draw a shape around the pile but try not to place any points on top of it. When you click on the last point, your area will be saved.
The total area, perimeter and volume of your shape will now be revealed.

The area, perimeter and volume information will be displayed after creating your shape.
That’s it! You’re good to use the Volume Measurement Tool at any time. If you have any questions, don’t hesitate to reach out to our customer support team. You can chat with a real live person on the phone at 701-412-2988, message us through the chat bubble on our website or check out FAQs at support.botlink.com.
For more video tutorials, visit out our YouTube channel.
